


Remember those sad, flat English muffins you grab from the plastic bag at the store? They just get crunchy—where’s the texture? Honestly, it used to drive me nuts! I am Felicia Hayes, and my mission here at Cooking by Felix is to prove that delicious, satisfying food doesn’t need to take all weekend. That’s why I’m thrilled to share my go-to recipe for homemade English muffins that are bursting with those signature nooks and crannies you think you can only get from a bakery. We’re reclaiming breakfast joy, and trust me, this easy method is going to change your morning routine for good. If you love easy mornings, you’ll find even more great inspiration over at my guide for quick and easy breakfast ideas, but start here first!
- Why This is the Best Homemade English Muffins Recipe You Will Make
- Ingredients for Easy Homemade English Muffins
- How to Prepare Homemade English Muffins From Scratch
- Tips for Perfect Soft and Chewy Homemade English Muffins
- Serving Suggestions for Your Homemade English Muffins
- Storage and Reheating Instructions for Homemade English Muffins
- Frequently Asked Questions About Homemade English Muffins
- Nutritional Snapshot of Your Homemade English Muffins
- Share Your Homemade English Muffins Success
Why This is the Best Homemade English Muffins Recipe You Will Make
I’ve tested countless bread recipes over the years, and I can promise you, these are the best homemade English muffins you’ll ever try. Why are they so good? Because we skip all the hard work! There is absolutely no kneading required here. That’s right—this is a beautifully simple, no-knead dough that lets the yeast do all the heavy lifting. This process gives you wonderfully fluffy English muffins without the stress. We also use baking soda, which reacts with the milk slightly, ensuring those internal tunnels form perfectly. For more simple baking magic, check out my guide on fluffy buttermilk pancakes!
Achieving Perfect English Muffins Nooks and Crannies
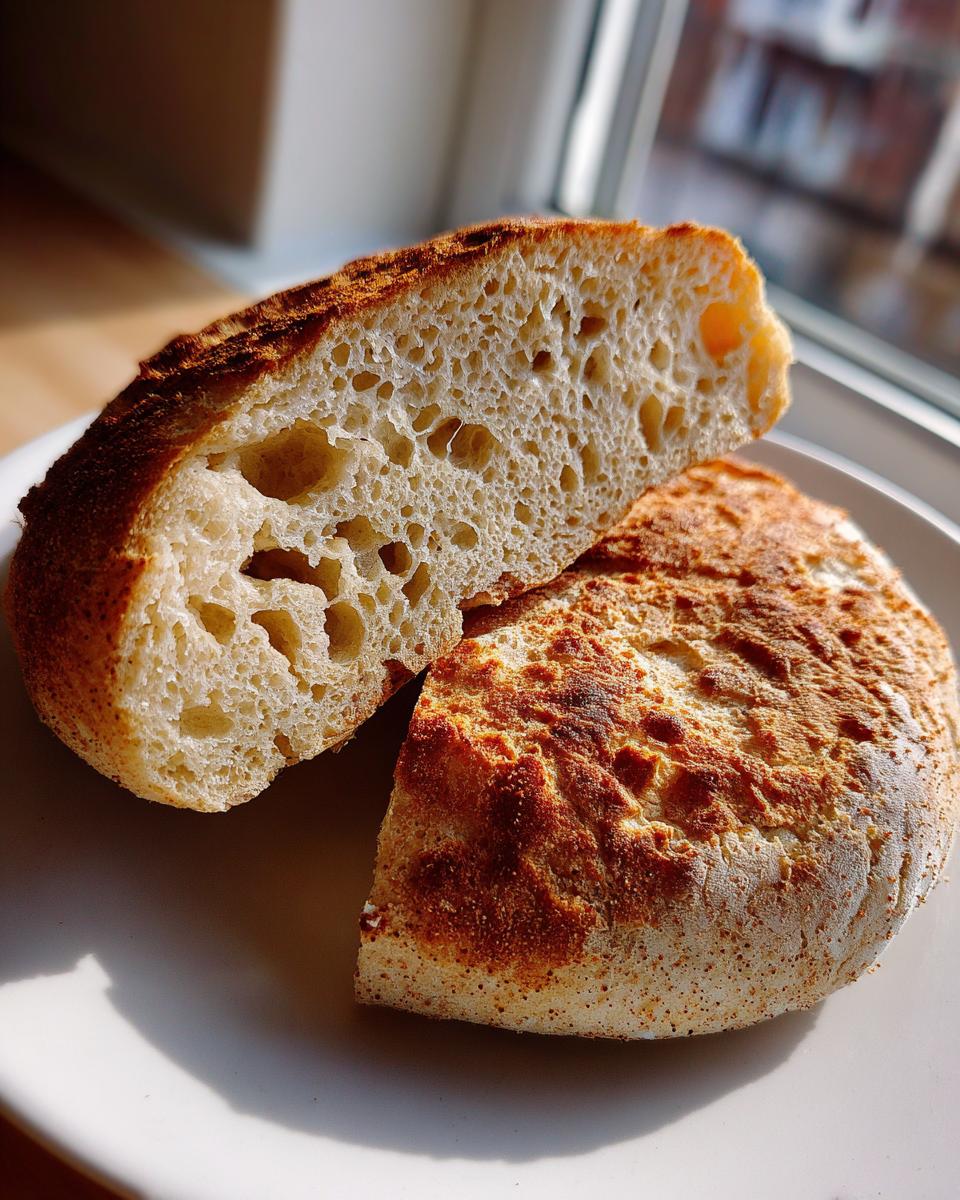
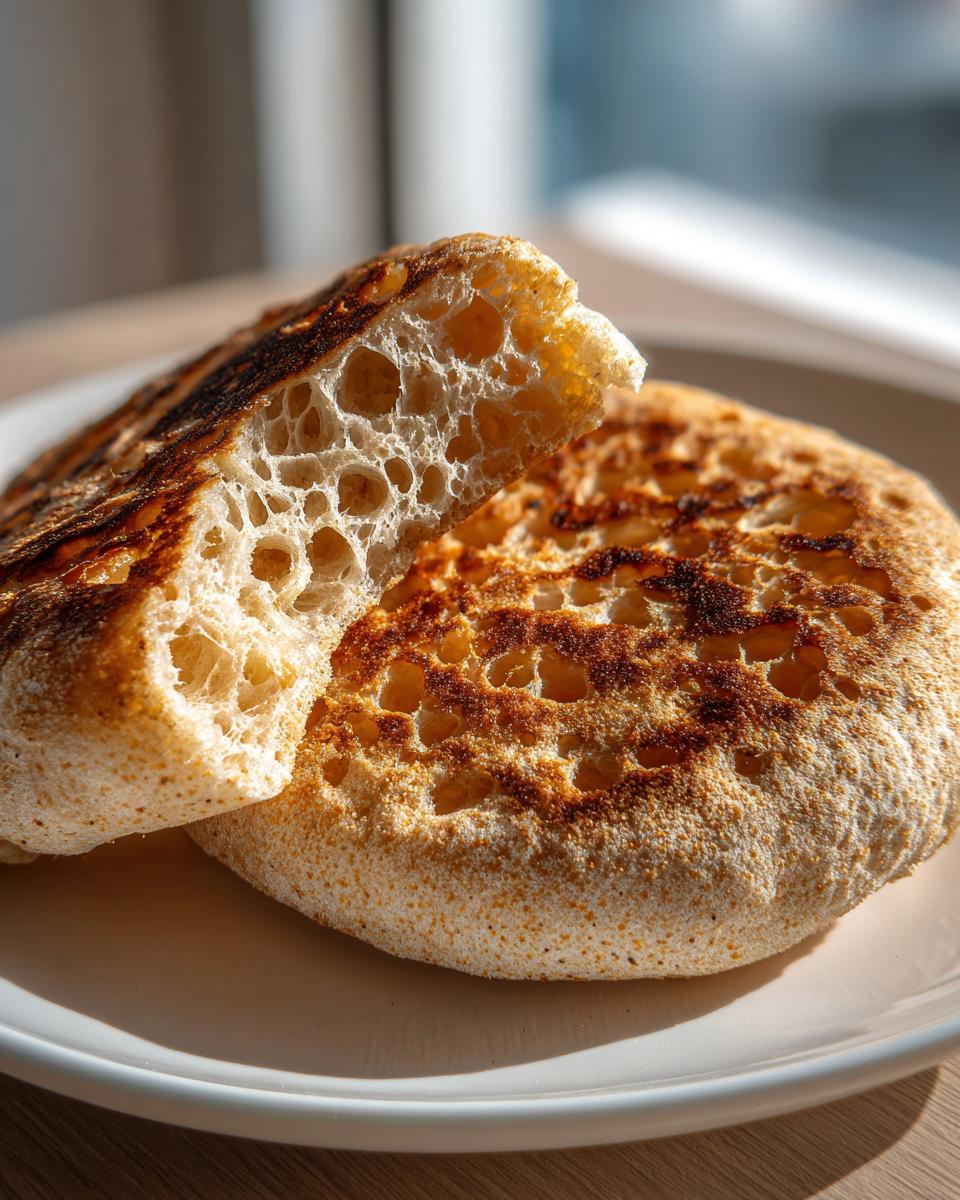
This is what everyone wants, and honestly, this recipe nails it every time. The secret to those famous Pockmarks—the nooks and crannies—is twofold. First, you need that nice, long rise from the yeast to build the basic structure. Second, that little bit of baking soda we introduce later creates carbon dioxide bubbles right before they hit the griddle. That rapid expansion is what blasts those little holes in there!
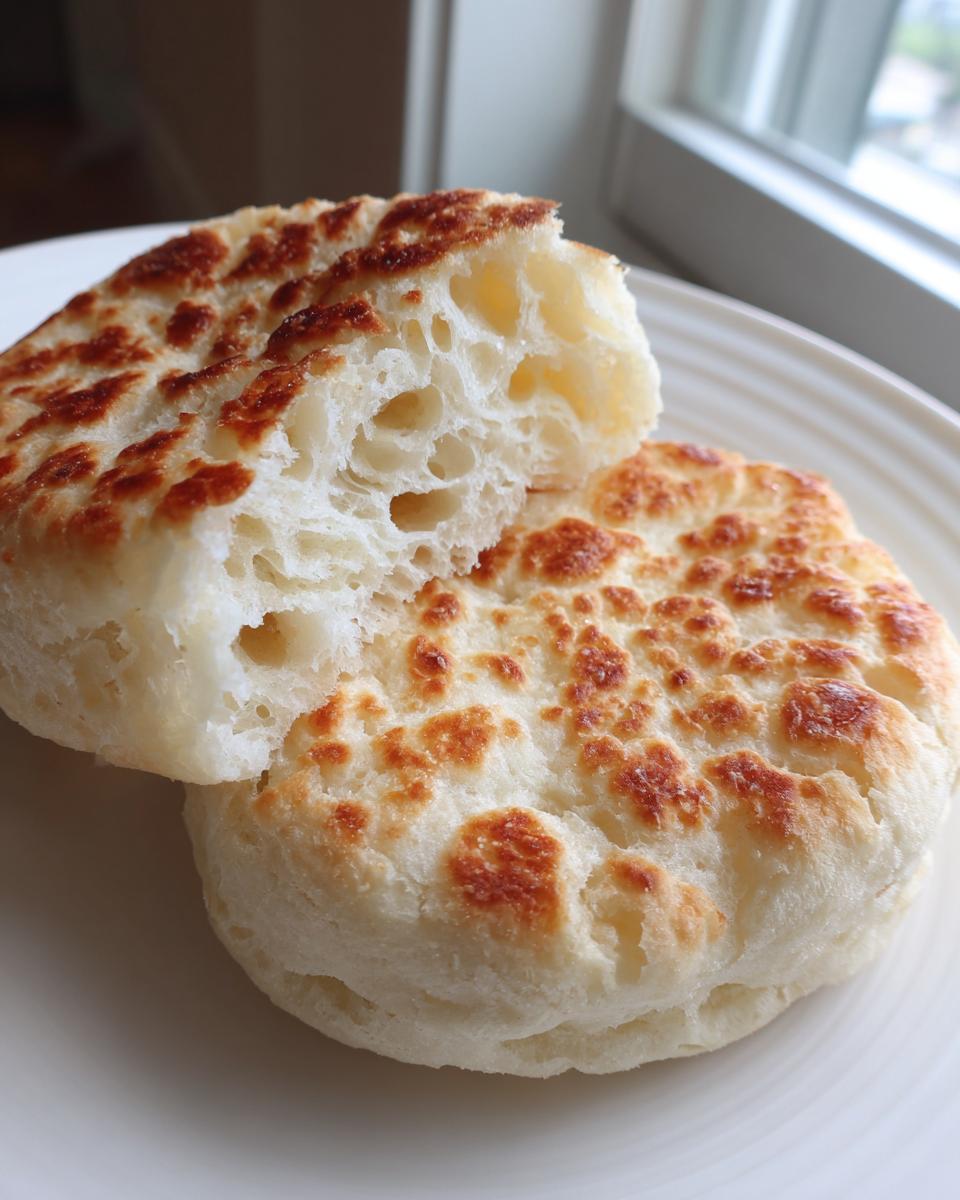
But here is my bonus tip: don’t cut them with a knife later! Once they cool, grab a fork and gently pull them apart. A knife squishes those lovely tunnels shut, but a fork preserves every single airy pocket. Don’t forget to use cornmeal liberally when you cut them out, too; that creates the signature rustic texture on the outside.
Ingredients for Easy Homemade English Muffins
The best part about this recipe, honestly, is that you probably have everything sitting in your pantry right now. I always aim for recipes that let you get right to the baking, and these English muffins from scratch are super accessible. We aren’t messing around with specialty flours or hard-to-find liquids. Just clean, simple ingredients are what we need to make these soft and chewy muffins.
Here is exactly what you’ll need:
- 2 cups all-purpose flour
- 1 tablespoon granulated sugar
- 1 teaspoon salt
- 1 packet active dry yeast
- 1 cup warm milk (about 105-115°F)
- 1 teaspoon baking soda
- 1 tablespoon melted butter, plus more for greasing
- Cornmeal, for dusting
That’s it! See? No fuss. I always use active dry yeast because it’s forgiving. And please, check the temperature of your milk—too hot and you kill the yeast dead. Too cold, and they take forever to rise. Aim for that sweet spot between 105°F and 115°F, kind of like a pleasantly warm bath.
How to Prepare Homemade English Muffins From Scratch
Alright, let’s get these glorious homemade English muffins started. This process is mostly hands-off waiting time, which I love because it frees me up to tidy the kitchen! Remember, we aren’t looking for a traditional bread-kneading action here. Our goal is structure without developing heavy gluten, which is how we get that beautiful, tender crumb. If you’ve mastered my naan bread, you know I believe in letting the dough do the work! You can see that recipe for homemade naan bread when you have time, but for now, focus on these muffins!
Mixing and the No Knead English Muffins Rest Period
First things first: we mix the dry ingredients together in a big bowl. That’s your flour, sugar, salt, and yeast all whisked up. Once that’s happy, pour in your warmed milk and that tablespoon of melted butter. Just mix it gently until it becomes a shaggy mess of dough. Don’t overwork it! Seriously. Cover that bowl with plastic wrap or a clean tea towel and stick it someplace warm—maybe on top of the fridge. You need to let this no knead English muffins dough rest for a full hour. When you come back, it should have doubled in size. That’s the yeast doing its magic!
Shaping and Preparing for Stovetop English Muffins Cooking
Once risen, we gently stir in the baking soda—watch it get a little foamy, that means it’s working! Now, dust your countertop really generously with cornmeal. This isn’t optional if you want that classic look! Turn the dough out and gently pat it down until it’s about three-quarters of an inch thick. Do not reach for the rolling pin; rolling pushes all the air out! Use a 3-inch cutter to punch out your rounds and place them on a baking sheet that is also covered in cornmeal. Cover them loosely again and let them chill out for just 30 minutes—this second rest firms them up before cooking.
The Stovetop English Muffin Skillet Recipe Method
Now for the fun part: the cooking! This might feel weird at first because you use a dry skillet—no oil, no butter, nothing! Get a heavy pan, like cast iron, nice and hot over medium-low heat. We want even, slow cooking. Carefully lay your rounds onto the hot surface, leaving space between them because they do swell up a bit. You’re cooking these stovetop English muffins for about 8 to 10 minutes per side until they’re beautifully golden brown. If you really want that ultra-soft interior, finish them in a 350°F oven for just 5 minutes after they come off the heat. This is my preferred technique for the ultimate bakery experience at home.

Tips for Perfect Soft and Chewy Homemade English Muffins
Keeping these soft and chewy homemade English muffins perfect comes down to a few small details after the dough is mixed. You know I stand by the fork-splitting method, right? That is non-negotiable if you want those pockets. Seriously, ditch the knife; your fork is your best friend here for revealing the glorious internal city structure.
Also, let’s talk about the cornmeal again. Don’t be shy with it when you dust your cutting surface and the sheet pan. That cornmeal is what gives the muffin its traditional, slightly gritty exterior texture that screams ‘bakery style.’ That texture is part of the whole experience!
Now for my personal touch, which I learned after a few minor disasters: when you are patting the dough out, try not to press down hard or use a rolling pin. When I first made these, I’d lean into the dough too much, trying to flatten those last few bubbles out. Big mistake! If you handle the dough too roughly after the rise, you deflate all the hard work the yeast did. Just gently pat until it’s about the right height. For more tips on how to keep things fluffy in your kitchen, check out my trick for old-fashioned fluffy pancakes!
Serving Suggestions for Your Homemade English Muffins
Now that you’ve mastered making these golden beauties, the fun really starts: eating them! Everything tastes wildly better when it’s spread across a freshly toasted, nooks-and-crannies-filled homemade English muffin. Honestly, even cheap margarine tastes gourmet on these.
Of course, the absolute classic is just grabbing one right off the cooling rack (after it’s cooled, promise!), splitting it with that dinner fork, and piling on butter so that it melts deep into all those hidden tunnels. A smear of good quality strawberry jam or maybe a tart cranberry preserve is perfection.
But you know I think about how to make your weekday mornings better, and that’s where the humble English muffin breakfast sandwiches come in. These muffins are sturdy enough to handle the mess. We’re talking a fried or scrambled egg, a slice of sharp cheddar, maybe a crispy piece of bacon or sausage patty—it holds everything together beautifully. Since they cook up faster than actual bread, they are amazing for quick weekday breakfasts.
If you’re feeling a bit fancy and want to use them for brunch, these are absolutely the perfect base for Eggs Benedict instead of those tricky, thin store-bought discs. Getting those perfectly soft yolks to ooze out over the muffin tops and ham is truly the pinnacle of breakfast indulgence. If you need a refresher on how to get that perfect runny center for your Benedict, I have a full guide on poached eggs that will help seal the deal!
Storage and Reheating Instructions for Homemade English Muffins
You’ve made a huge batch of homemade English muffins, and now you’re wondering, how do I stop myself from eating twelve of them right now? Don’t worry, they keep beautifully! We want to maintain that soft, chewy texture we worked so hard to achieve, so storage matters a lot.
If you plan on eating them all within a day or two, leaving them on the counter is fine. Just make sure they are completely cool first! Pop them into a large zip-top bag or an airtight container. Make sure you let them reach room temperature first, though. Putting warm muffins into plastic is basically setting up a steam bath, and nobody wants soggy English muffins, right?
For longer keeping, freezing is your very best move. I always slice them in half before they go into the freezer—this is a game-changer! Lay the halves out on a tray for about an hour until they are totally solid, then transfer them into a freezer bag, squeezing out as much air as possible. They’ll last for good three months this way, easy peasy.
Refreshing Your Muffins Later On
When you’re ready for that classic breakfast experience, you have a couple of options. If you’ve got them frozen solid, don’t trust the toaster slots right away; they might jam or break apart. Instead, pop those frozen halves straight into the toaster oven or lay them directly on a preheated skillet (medium-low heat) until they are warmed through and slightly crisp—just a minute or two per side.
For muffins that are just a day or two old, toasting is perfect. But I actually have a personal trick for making them feel truly fresh-baked again. After they come out of the toaster, I usually give the cut sides a little brush of melted butter, then let them sit open-face for about five minutes before digging in. It softens them just slightly and brings back a wonderful warmth. Wonderful!
Frequently Asked Questions About Homemade English Muffins
When you bake something new, questions always pop up! I totally get it. I’ve pulled together the most common ones I hear about this recipe so you can feel totally confident rolling these out for your next easy weeknight breakfast. If you still can’t find what you need, feel free to pop over to my contact page—I love hearing from you, especially about quick and easy breakfast successes!
Can I make these buttermilk english muffins instead?
Oh yes, you absolutely can! Using buttermilk English muffins is a great idea for an extra tangy flavor, which really elevates the final product. If you want to swap out the regular milk for buttermilk, you should be just fine since this recipe inherently uses baking soda anyway. Buttermilk reacts strongly with leaveners. To keep them perfectly balanced and ensure you get those soft and chewy homemade English muffins, you might want to drop the baking soda down just a hair—maybe 3/4 teaspoon instead of a full teaspoon. Taste test your dough mix at that point, and trust your gut!
How long does it take to make these quick english muffins?
When people ask for quick English muffins, they usually mean fast active time, and this recipe delivers! Your actual hands-on time is quite low; maybe 15 minutes for mixing and shaping. After that, the dough needs about an hour to rise, and then you cook them for about 20 minutes total on the griddle. So, while the total time is close to an hour and 40 minutes, most of that is the dough happily resting on its own. It’s proof that great food from an easy English muffin recipe takes patience, but not effort!
What if I don’t have a cast iron skillet for stovetop cooking?
Honestly, the pan matters less than the heat! If you don’t have a cast iron skillet—which I love because it holds ambient heat so well—you can absolutely use a heavy-bottomed stainless steel skillet or even a good non-stick griddle. The key here is that medium-low, steady heat we talked about. If you try to cook these bakery style English muffins at home over medium or medium-high heat, the outside will burn before the inside is cooked through, and you won’t get those nice sides! Go low and slow to ensure a perfect interior.
Nutritional Snapshot of Your Homemade English Muffins
I know some of you are tracking your macros, or maybe you just like knowing what you’re fueling up with before you tackle your day. Because this is a homemade recipe using simple ingredients, you have total control! These estimates give you a good ballpark idea of what’s in one of these delicious, fluffy muffins.
Keep in mind that these are just estimates based on the full recipe yield. If you cut them into smaller pieces or add heavy toppings like cheese and bacon for your English muffin breakfast sandwiches, those numbers are definitely going to change!
- Serving Size: 1 muffin
- Calories: 180
- Fat: 3g
- Saturated Fat: 1.5g
- Carbohydrates: 33g
- Sugar: 2g
- Protein: 6g
- Sodium: 350mg
See? Pretty reasonable for something that tastes this amazing! When you make these homemade English muffins yourself, you avoid all the weird preservatives and stabilizers they put in the store-bought ones, which is a huge win in my book. It’s nourishing food that tastes like a treat!
Share Your Homemade English Muffins Success
Now that you have managed to conquer the art of the fluffy interior and perfectly scorched exterior, I really, really want to know how they turned out! This is where the community comes in. Did you get those signature nooks and crannies? Were they the perfect base for that incredible breakfast sandwich you dreamed up?
Please do me a favor: if you loved making these, help another busy person find them! Rate this recipe with five stars right down below—it genuinely helps other home cooks trust the process. And when you photograph your gorgeous stack of homemade English muffins, tag me on social media so I can cheer you on from my kitchen to yours!
Most importantly, share the joy in the comments! What’s the absolute best way you eat yours? Are you a strictly butter-and-jam purist like my dad, or do you load them up with cheese and eggs for a hearty brunch? I’m always looking for new ways to enjoy these easy wins, so don’t hold back!
If you ever have a question about the dough, the cooking temperature, or even if you want to send me photos of your first successful batch, you can always reach out directly through my contact page. Happy baking, everyone!
PrintEasy Homemade English Muffins with Signature Nooks and Crannies

Make bakery-style English muffins at home. This simple recipe yields soft, chewy muffins full of those classic nooks and crannies, perfect for breakfast sandwiches or toasting with butter and jam.
- Prep Time: 15 min
- Cook Time: 25 min
- Total Time: 1 hour 40 min
- Yield: 8 servings 1x
- Category: Breakfast
- Method: Stovetop/Skillet
- Cuisine: American
- Diet: Vegetarian
Ingredients
- 2 cups all-purpose flour
- 1 tablespoon granulated sugar
- 1 teaspoon salt
- 1 packet active dry yeast
- 1 cup warm milk (about 105-115°F)
- 1 teaspoon baking soda
- 1 tablespoon melted butter, plus more for greasing
- Cornmeal, for dusting
Instructions
- In a large bowl, whisk together the flour, sugar, salt, and yeast.
- Warm the milk until it is between 105-115°F. Pour the warm milk and melted butter into the dry ingredients. Mix until a shaggy dough forms.
- Cover the bowl and let the dough rest in a warm place for 1 hour, or until it has doubled in size. This recipe requires no kneading.
- Gently stir in the baking soda. The dough will become slightly foamy.
- Lightly dust a clean surface with cornmeal. Turn the dough out onto the surface. Pat the dough out to about 3/4 inch thickness. Do not use a rolling pin.
- Use a 3-inch round cutter to cut out the muffins. Place the cut rounds onto a baking sheet heavily dusted with cornmeal.
- Cover the cut muffins loosely and let them rest for 30 minutes.
- Heat a large, dry cast iron skillet or griddle over medium-low heat. You do not need oil or butter in the pan.
- Carefully place the muffins onto the hot skillet, leaving space between them. Cook for 8 to 10 minutes per side, until golden brown. The internal temperature should reach 200°F.
- For a lighter interior, you can finish the muffins in a 350°F oven for 5 minutes after stovetop cooking.
- Cool completely on a wire rack before splitting them with a fork to reveal the nooks and crannies.
Notes
- Use cornmeal liberally when dusting your surfaces and pans; this creates the signature texture on the outside of the English muffin.
- To get the best nooks and crannies, split the cooled muffins using a fork rather than slicing them with a knife.
- These are excellent for making quick English muffin breakfast sandwiches.
Nutrition
- Serving Size: 1 muffin
- Calories: 180
- Sugar: 2
- Sodium: 350
- Fat: 3
- Saturated Fat: 1.5
- Unsaturated Fat: 1.5
- Trans Fat: 0
- Carbohydrates: 33
- Fiber: 1
- Protein: 6
- Cholesterol: 5